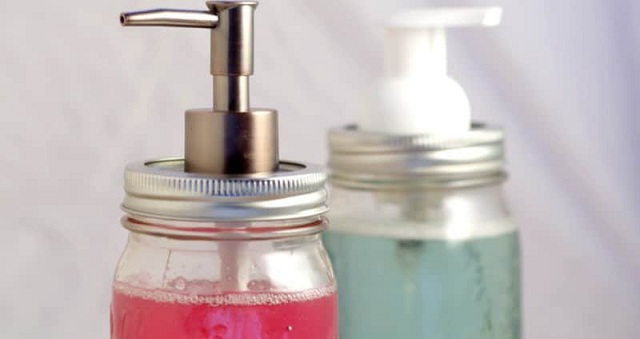
How to Make A Soap Dispenser?
We’ve all seen those Mason jar soap dispensers at expensive home improvement shops, small markets, online, or wherever. Or, if you have great crafting skills, you can make one and it will cost you less than half of what it would cost if you bought it at the shop. If you’re also interested in DIY a Mason Jar Soap Dispenser, be sure to read this post!
Step 1: Get A Mason Jar and Soap Dispenser
First, you’ll want to obtain a Mason Jar with a lid and a soap dispenser and clean them both. Remove the lids from the Mason jar and the soap dispenser. Now set them aside and let’s move on to the second step.
Step 2: Drill Your Lid
Now you need to take the lid of the Mason jar and mark the center of the lid with a marker. Then use an awl to make a dent in the center.
Now you need to take the lid of the Mason jar and mark the center of the lid with a marker. Then use an awl to make a dent in the center. Use the mouth of the soap dispenser bottle to determine the size of the hole that needs to be drilled. This step is more important and you can do it with the help of a tool for measuring dimensions. Next, you will be required to hold the cap with a clamp and drill a hole where you marked the cap. You can be use a hand drill to make it easier. The most important part is the clamp, you need to tighten the lid to turn the hole.
Step 3: Use A Round File
Once you’ve finished drilling, you’ll notice some sharp, jagged pieces of metal around the edges of the holes. This is where you will need to use a round file to remove these pieces and the hole will be nice and smooth. This also makes for better bonding later on.
Step 4: Cut the Bottleneck of the Soap Dispenser Bottle
Now you need to cut the neck off the plastic soap dispenser bottle, which will leave some of the material behind. After cutting, just sand or file a little around the base to rough up the plastic a little. The glue will bond better that way.
Step 5: Glue Lid
Start by sanding the lid with sandpaper so the primer can adhere better. Always remember to wash the cover with water after sanding and allow it to dry thoroughly.
Now lower the lid and spray on a coat of primer, holding the primer can 6 to 10 inches from the glass bottle lid and spraying in a quick, sweeping motion. Let dry for at least an hour before painting. Remember not to spray too thickly.
Step 6: Secure Pump to Lid
Next, you will need to thread the neck of the soap dispenser bottle through the lid of the Mason jar and glue them in place using hot melt glue. Finally, screw on will the soap dispenser pump, you can use a rubber ring as a gasket to create a good seal.
Step 7: Screw on Your Lid
Now, simply fill the Mason jar with soap and screw on the lid! The great thing about this is that even if the soap dispenser pump breaks, you don’t need to worry about it, you just need to replace the pump with a new one, and you don’t need to change out the lid at all.
If you like this DIY soap dispenser too, you can start acting on it right away, which can help you get rid of plastic bottles. If you don’t have Mason Jars, you can buy them from our website where we offer Cheap Manson Jars.



-
-
8 月
Tagged Glass Bottle, Glass Cosmetic Jar, Glass Jars